STRETCHES FOR SKIING
Simple, yoga based stretches which focus on areas that are known to get a workout from skiing (that said, any of these would be beneficial to any activity).
Remember Yoga is all about breath and the stretches will be much more beneficial if you can breathe deeply and fully in each position. If you are holding your breath or squeezing yourself into a position, it’s unlikely to be doing you the good it is designed for!
Stay mindful during stretching and listen to your body, feeling the stretch and feeling a movement to be tough, but do-able is okay, feeling pain is NOT the goal.
I have included images of less and more intense versions of the stretch in some cases, but even if there is no picture of a less forceful stretch option, please do only what is within the limits of your body on any given day.
I am not a doctor, so if in doubt or you have a medical condition of any sort, don’t do these poses before consulting a medical professional. If you are pregnant, listen to your body and avoid anything that leans on or folds into your bump.
Happy stretching, Nicole
Stretch One
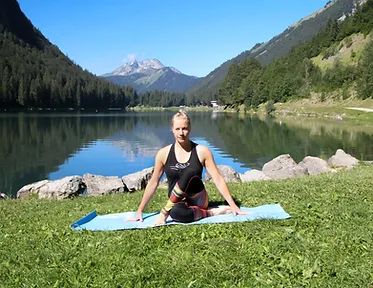
- Start sitting down and cross your legs one over the other as shown in the first picture – right leg folded with the foot next to the left hip, the thigh along the floor and the left leg up, with the knee pointing towards the sky and the sole of the foot on the floor.
- Lift your left arm straight up in the air and bring it across your body so the back of your arm rests on your left knee.
- Raise yourself up tall, lengthening your spine all the way up from the floor to the top of your head.
- Bend your arm at the elbow and using your arm as a lever against the raised knee, twist to the right on an out- breath.
- Hold your position for each in-breath and on every out-breath deepen your twist a little bit more.
- Untwist slowly and exchange legs to stretch the other side.
Stretch Two
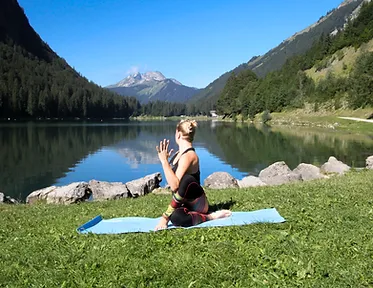
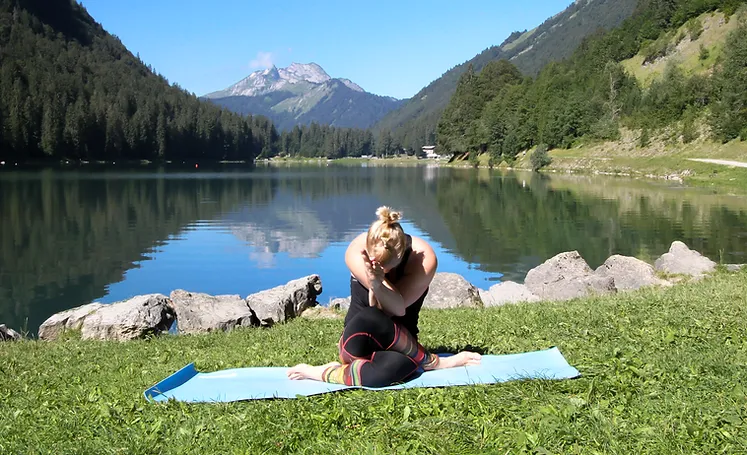
- Have your legs as explained in the stretch above and then lower your top leg so it is lying along your bottom leg. The perfect position is with one knee directly over the other – but just go as far as you can.
- Hold your arms out straight to the side, then bring them in front of your face with one crossed over the other at the elbow. If the top leg is the left one, the bottom arm will also be the left one.
- From this position lift your hands and drop your elbows to bring the backs of your palms together.
- If you can, then move the hand which in the bottom of the twist towards your face and try to connect with the palm or wrist of the other arm.
- Drop your head and round your spine, bringing your arms towards your knees to feel the stretch.
- Again, move on an out-breath and stay where you are on an in-breath, you can lower your body down towards your legs as much as you can.
- Make sure the foot of the leg on the floor is not too far under your bottom or it can prevent the full stretch in the hips.
- You may feel this in your hips, lower back and if you stretch your arms forward enough, in the shoulders too.
Stretch Three
- Start on your hands and knees. Slide your right leg back a bit to make room for your left leg to move and bring your left leg across your body so your left knee is behind your left wrist, like in the photo.
- Gently and slowly slide your right knee back along the floor until you feel the stretch in your right hip.
- Try to keep your hips horizontally straight and not to lift one side as you sit deeper into the stretch.
- If your left knee can’t bend as much as in the picture, move your left ankle back to make your leg more vertical than horizontal to take the strain off your knee.
- Your back foot should be straight out behind you, in line with the hip.
- You will feel the stretch in your bottom and the length of the thigh of the bent leg. This stretches your hip rotators and flexors.
- Hold for 5 breaths, (or as long as you want to)! To get out of the pose, tuck the toes of your right foot under and push yourself up with your arms into a plank so you can unfold your left leg.
- Return to your hands and knees and swap legs.
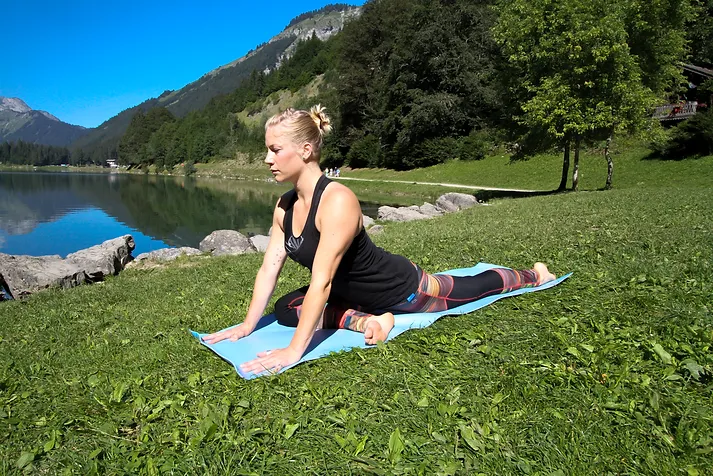
Stretch Four
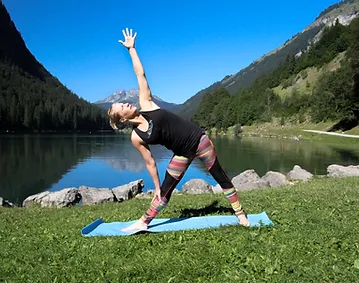
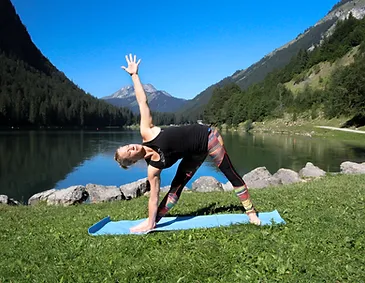
- Start standing with your feet quite wide apart and turn your right foot out 45 degrees. The right heel should now be in line with the centre of your left foot.
- Raise both your arms out to the sides, in line with your shoulders.
- Tip your body from the waist in the direction your right foot is pointed. When you have reached as far out as you can go, begin to tip yourself downwards, fingers of your front hand moving towards your right toes .
- Keep both your legs straight and rest your hand on whatever part of your leg you can reach, apart from your knee joint – or if you’re bendy, the floor. It is better to rest on your leg and keep your hips straight than to go for the floor and end up tilting forward at the hips.
- Hold, breathing deeply for a good few breaths, then straighten up slowly, with engaged abs to protect your back, returning the same way as you got into the stretch and then repeat on the other side.
- You can choose to look straight ahead and not up to the top hand if your neck prefers a neutral position.
- This stretch will strengthen your core, stretch the side waist, hips, hamstrings and groin.
Stretch Five
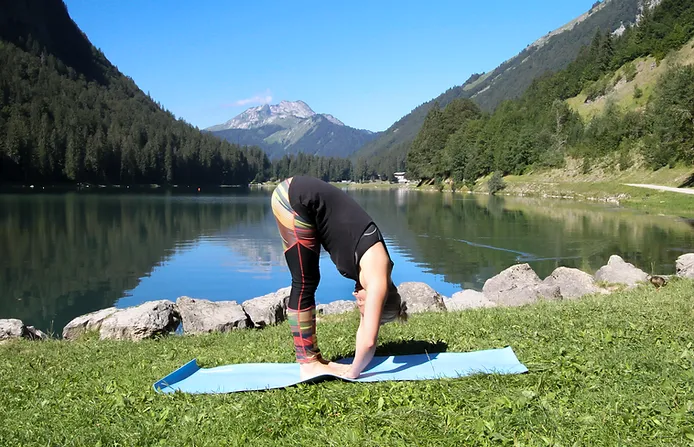
- Stand with your feet hip width apart.
- Bend forwards slowly until your hands can touch your feet. It is absolutely NOT required to have straight legs. Ideally, you should bend your legs as much as needed to have your ribs on your thighs – thus protecting your lower back – to get your hands to the floor.
- When they are there, put them under your feet with your toes resting against your wrists.
- Drop your head and breathe deeply. You can put pressure on your hands – one at a time with your feet – this strengthens your wrists and massages your hands which might feel sore from holding a ski pole all day.
- Gradually, if you can, begin to straighten your legs so you can feel the stretch in the back of your legs.
- To return, un-tuck your hands, bends your knees again and come up slowly to standing with engaged abs.
Stretch Six
- Start sitting on the floor with your legs out in front of you, leaning back on your hands with your fingers pointing towards your feet and the ends of your fingers in line with your hips.
- Bend your knees so your feet are flat on the floor and while breathing out, lift your hips into the air until they are parallel with your knees and shoulders.
- Tip your head back, engage your core and lift your hips as much as you can, breathing slowly and deeply.
- If that feels easy, you can straighten your legs like the photo on the right, making sure the soles of your feet are fully on the floor and as before push your hips up towards the sky.
- Be careful if you have limited movement in the wrists – this might not be the stretch for you.
- You may feel the stretch in the wrists, triceps, shoulders, back and legs.
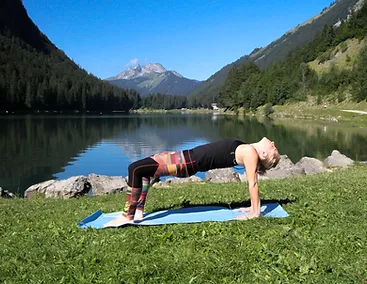
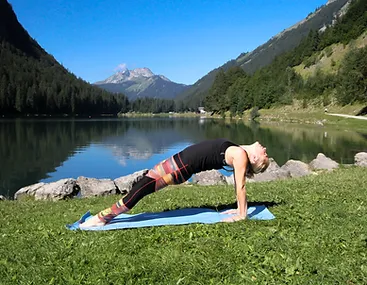
Photo credit : Magdalena Przybylska
VERY impressed with my massage from Mobile Mountain Massage. After a hard week skiing, it was exactly what I needed. Best massage I have had! Highly recommend.
Jess Boerema
